With a budget, we all want to know one thing. How much money do we have leftover?
Tired of budgets not working for you? Read below to get a simple and effective bi-weekly budget.
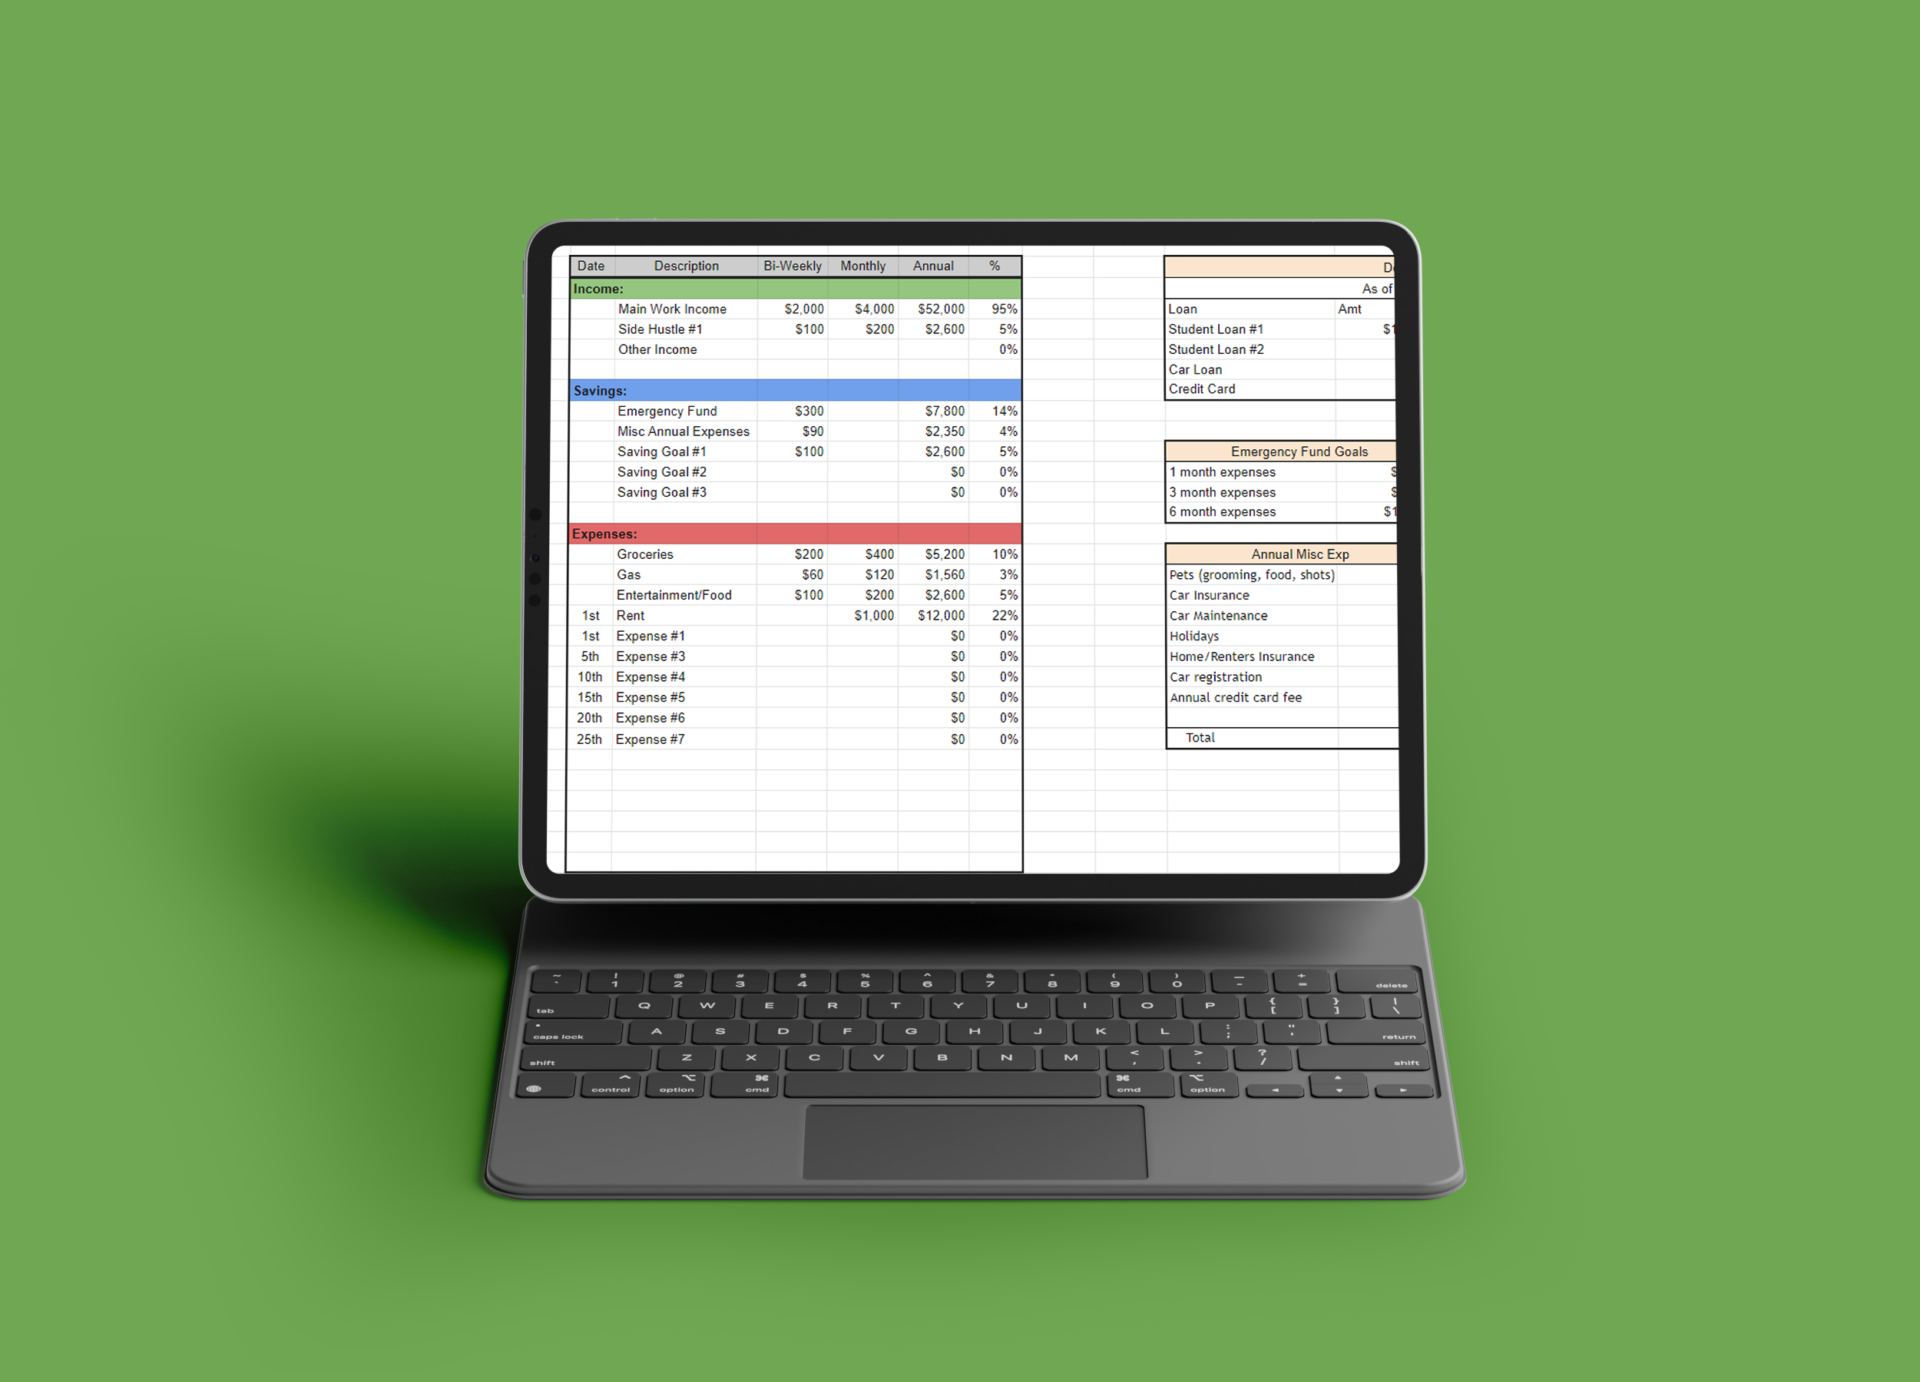
Bi-Weekly Budget
When I first started getting serious about my finances, aka when my first student loan payments came due and crushed my soul, I looked for easy to use budgets.
Most of the budget templates and examples were based on a “monthly” income. This made sense for bills that hit monthly, but I got paid every 2 weeks. I could double my paycheck and use that as my monthly income but it still felt off.
I find it easier to break down my budget into smaller time frames.
With all that being said, I use the bi-weekly or paycheck budget method. The majority of people get paid bi-weekly, so it would make sense to use this method. This is especially true for a young adult with fairly simple finances.
The bi-weekly budget was the only budget that has made sense to me. If you want the template that I have always used and recommended, download it below. I have made updates to my original template but the concept is still the same. I assign every dollar to a category.
4 Steps to Create Your Budget
Step 1: Get your dates in order
Write down the dates your expenses are due and also write down dates for each time you get paid. This will help you see what expenses are coming out of each paycheck. Rent is usually the biggest expense. Depending on how the date of the paychecks, you can break your rent into 2 payments. Lessening the blow.
You should have a good idea of how much you get paid bi-weekly after taxes and deductions. If not, go look in your bank and add your take home pay to your budget.
Step 2: Annual Expenses
Estimate all your random expenses that happen throughout the year that are not recurring. You should be able to estimate how many birthdays you are going to have to spend money on – Valentine ’s Day, weddings, your dog’s vet checkups, anniversaries, and so on. If you pay your car insurance twice a year, budget this out.
Find the total of all these expenses and divide it by the number of paychecks you receive in a year. If you get paid bi-weekly, you will divide by 26. Then, have that amount come out of each paycheck and go directly into a savings account. Whenever those once per year expenses “pop up” you will just use this money you set aside.
The best place I have found to put this money is in a high-interest savings account at another bank separate from your primary bank. Auto deposit it from your check and then use it for the intended purpose.
Step 3: Savings Goals
List out your savings goals, whether short term or long term. If you are saving for an emergency fund, vacation, extra towards debt or a new car this should be listed. Find the timeline and then figure out how much you need to save from each paycheck to meet your goals.
I find it helpful to create multiple savings buckets to separate out each of my savings goals.
Step 4: Assign Leftover Money
If you have leftover money, assign it a category. Are you going to spend this or save/invest it? By being intentional, your money won’t slip through the cracks. Assign the money to a specific category so it does not get spent on miscellaneous items.
To summarize the bi-weekly budget:
- List your income and the dates your get paid
- Find out your expenses
- List out your savings goals
- Any leftover money should be assigned to a category
- Create savings buckets in a high-interest saving account
Take your income then subtract expenses and savings goals. This should give you a good idea of leftover money to allocate as you need.
A budget is the first step to stop your money from getting out of control. If you do not use a bi-weekly budget, just use a budget of some kind that works best for you.
It can be as simple or complex as you need. The important part is to be able to see where your money is going.
Check out the free budget template that has worked to help get my finances under control.
Share with me in the comments about what budget works best for you!